Understanding motorcycle wiring is crucial for both enthusiasts and beginners. A Simple Guide to Motorcycle Wiring Basics will help you navigate the complexities of your bike’s electrical system. This guide covers essential components, wiring diagrams, and troubleshooting tips to ensure your motorcycle runs smoothly.
| Specification | Details |
|---|---|
| Battery Type | Lead Acid / Lithium-Ion |
| Wiring Gauge | 16 AWG to 10 AWG |
| Fuse Rating | 10A to 30A |
| Connector Type | Spade / Bullet Connectors |
| Grounding Method | Chassis Ground |
Understanding Motorcycle Wiring Basics
Motorcycle wiring consists of various components that work together to power the electrical systems of your bike. The main components include the battery, ignition system, lighting, and various sensors. Each of these elements plays a vital role in ensuring your motorcycle operates efficiently. Understanding how these components interact will help you troubleshoot issues and perform maintenance effectively.
Essential Components of Motorcycle Wiring
The essential components of motorcycle wiring include the battery, wiring harness, fuses, and connectors. The battery provides the necessary power to start the motorcycle and run electrical systems. The wiring harness connects all electrical components, while fuses protect the circuits from overload. Connectors ensure secure connections between wires, preventing shorts and failures.
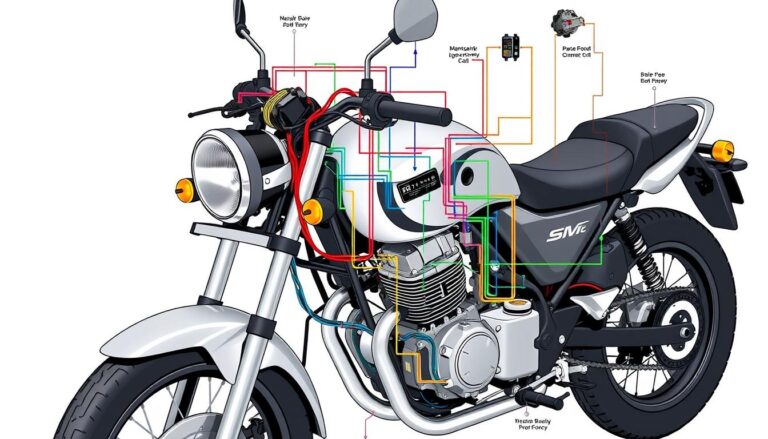
Wiring Diagrams for Motorcycles
Wiring diagrams are invaluable tools for understanding the electrical layout of your motorcycle. They provide a visual representation of how components are connected, making it easier to diagnose issues. You can often find wiring diagrams in your motorcycle’s service manual or online resources. Familiarizing yourself with these diagrams will enhance your ability to troubleshoot and repair electrical problems.
Troubleshooting Common Wiring Issues
Common wiring issues in motorcycles include blown fuses, faulty connectors, and damaged wiring. If your motorcycle experiences electrical problems, start by checking the fuses. A blown fuse can indicate a short circuit or overload. Inspect connectors for corrosion or damage, and examine wiring for frays or breaks. Addressing these issues promptly can prevent further damage and ensure your motorcycle remains operational.
Upgrading Your Motorcycle Wiring
Upgrading your motorcycle wiring can enhance performance and reliability. Consider using higher gauge wires for better conductivity and installing modern connectors for improved durability. Additionally, replacing old components with new, high-quality parts can reduce the risk of electrical failures. Always refer to your motorcycle’s specifications when making upgrades to ensure compatibility.
Safety Tips for Working with Motorcycle Wiring
When working with motorcycle wiring, safety should be your top priority. Always disconnect the battery before starting any electrical work to prevent shocks or shorts. Use insulated tools and wear safety glasses to protect your eyes. If you’re unsure about any aspect of the wiring, consult a professional or refer to your motorcycle’s service manual for guidance.
Resources for Further Learning
For more information on motorcycle wiring, consider visiting GizmoWheelz for articles and resources. Additionally, forums and online communities can provide valuable insights and support from fellow motorcycle enthusiasts. Engaging with these resources will deepen your understanding of motorcycle wiring and maintenance.
Conclusion
Mastering motorcycle wiring basics is essential for any motorcycle owner. By understanding the components, utilizing wiring diagrams, and following safety protocols, you can ensure your motorcycle remains in top condition. Whether you’re troubleshooting issues or upgrading your wiring, this guide serves as a valuable resource for all your motorcycle electrical needs.
Advertisements

Leather Honey Leather Cleaner: Non-Toxic Leather Care Made in the USA Since 1968. Deep Cleans Leather, Faux & Vinyl - Couches, Car Seats, Purses, Tack, Shoes & Bags. Safe Any Colors & White Leather
$16.99 (as of February 25, 2025 01:59 GMT +00:00 - More infoProduct prices and availability are accurate as of the date/time indicated and are subject to change. Any price and availability information displayed on [relevant Amazon Site(s), as applicable] at the time of purchase will apply to the purchase of this product.)
EcoNour 27" Aluminum Snow Brush with Ice Scrapers for Car Windshield and Window | Car Snow Scraper and Brush with Ergonomic Foam Grip Winter Accessories (Orange)
$11.98 (as of February 24, 2025 01:15 GMT +00:00 - More infoProduct prices and availability are accurate as of the date/time indicated and are subject to change. Any price and availability information displayed on [relevant Amazon Site(s), as applicable] at the time of purchase will apply to the purchase of this product.)